How to Replace a Deadbolt Lock Yourself: A Step-by-Step DIY Guide
Replacing a deadbolt lock is one of the most practical home security upgrades you can make — and it takes less than an hour with basic tools. Whether you've just moved into a new home, lost a key, or simply want to upgrade to a more secure lock, this is a DIY project that pays for itself immediately. No locksmith required, no special skills needed, and the savings are real: a locksmith typically charges $75–$150 just to swap a lock.
Why You Should Replace Your Deadbolt
Most people never think about their deadbolt until something goes wrong. But there are several situations where replacing it is the smart move:
You just moved into a new home or apartment (you don't know who has copies of the old keys)
A key was lost or stolen
You want to upgrade to a higher-security or smart lock
The existing lock is worn, stiff, or difficult to operate
You're rekeying after a breakup, roommate change, or contractor visit
A quality deadbolt costs $25–$80 at any hardware store. Compare that to a locksmith visit, and the math is obvious. Use the Percentage Calculator to see exactly how much you're saving versus hiring out — it's often 60–80% less when you do it yourself.
What You'll Need
Before you start, gather these tools and materials:
New deadbolt lock set (make sure it matches your door's existing hole size — standard is 2-1/8" diameter)
Phillips head screwdriver (or a drill with a screwdriver bit)
Flathead screwdriver
Tape measure
Chisel (only if you need to adjust the strike plate mortise)
Optional: hole saw kit if you're adding a deadbolt to a door that doesn't have one
When shopping for a new deadbolt, check the backset measurement — the distance from the edge of the door to the center of the lock hole. Most doors use a 2-3/8" or 2-3/4" backset. Your new lock should match, or look for an adjustable-backset model. Use the Unit Converter if you're working with metric measurements or need to convert between inches and millimeters when comparing lock specs.
Step 1: Remove the Old Deadbolt
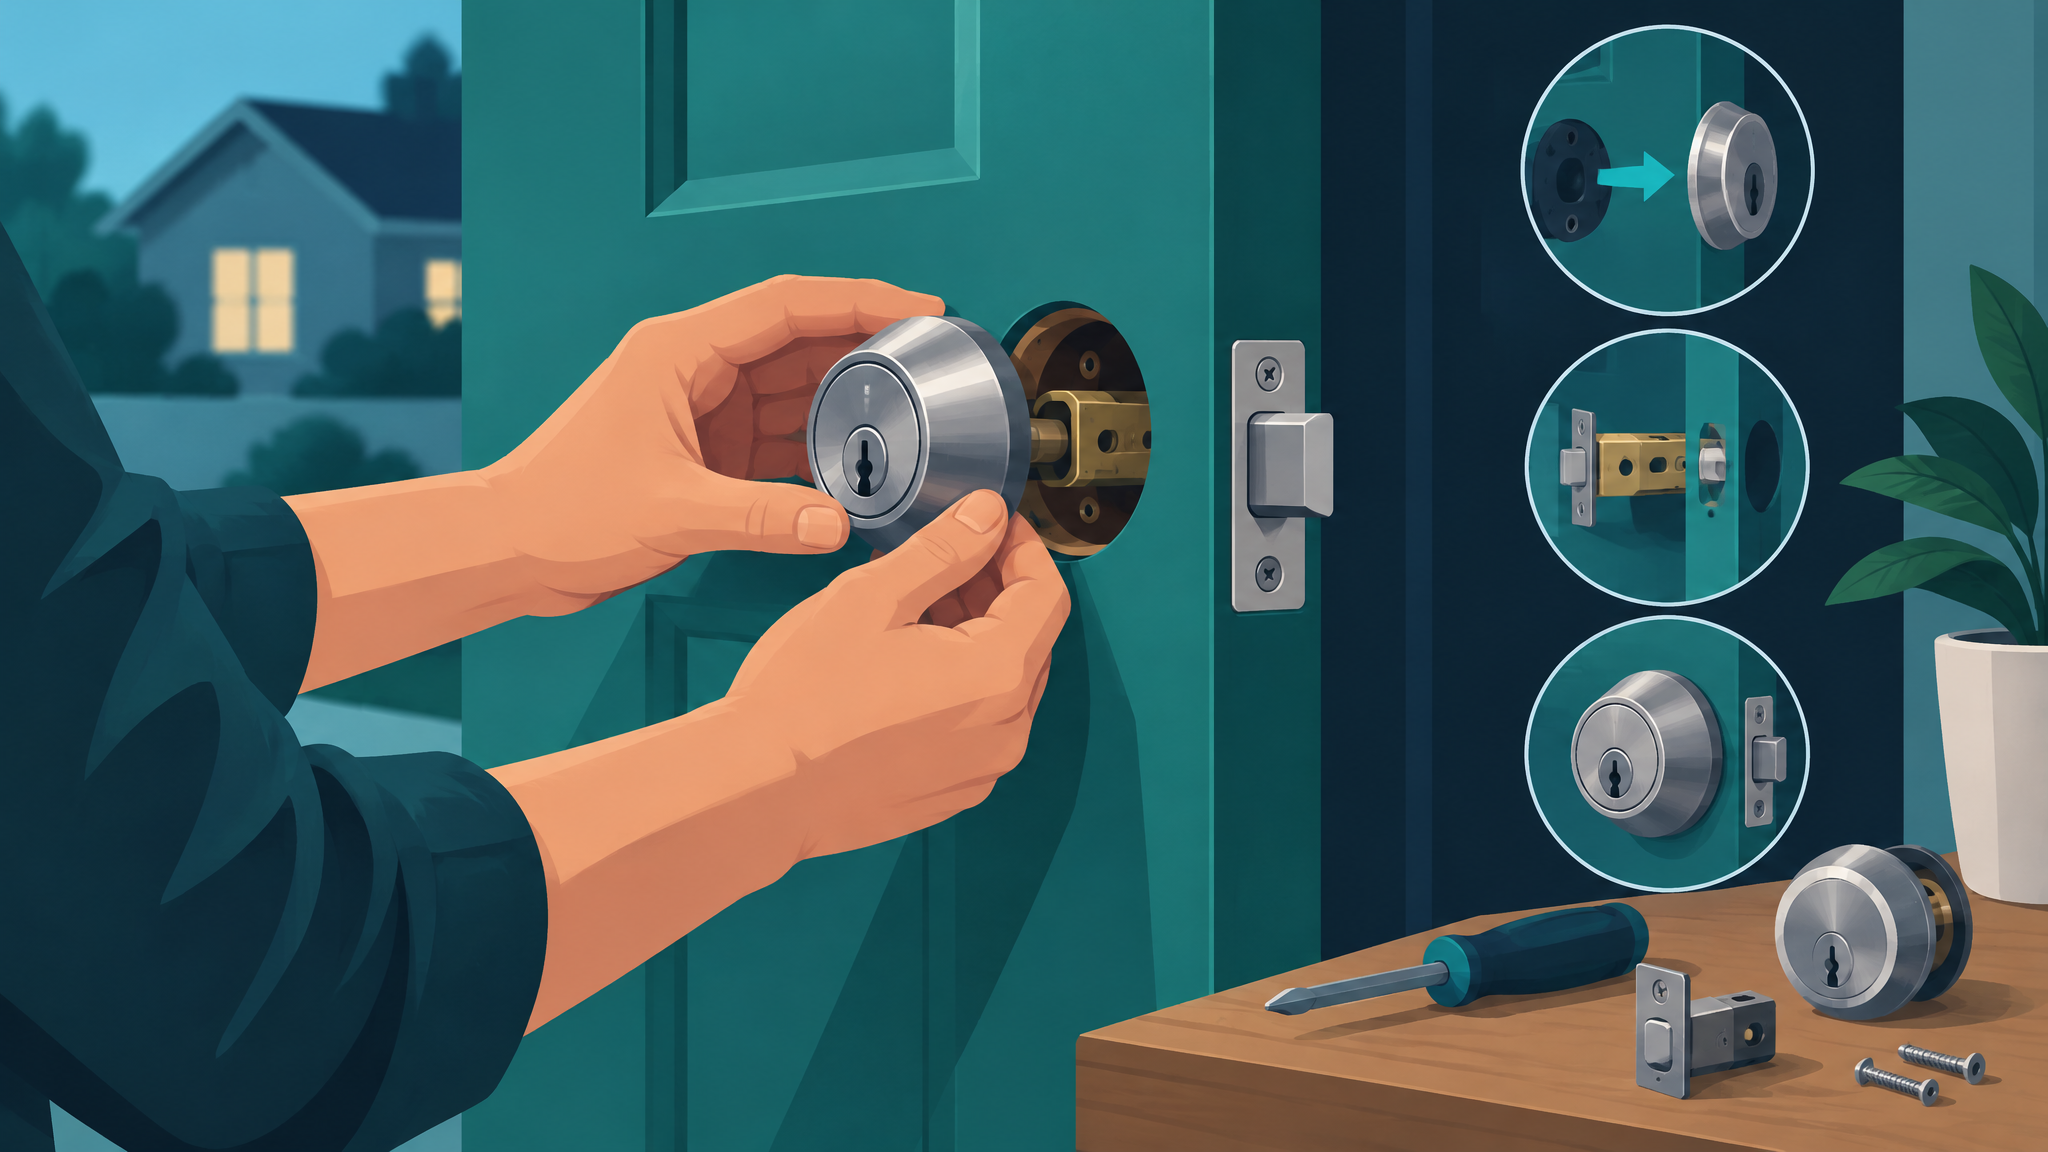
Start on the interior side of the door. You'll see two screws holding the interior escutcheon (the decorative plate) and thumb-turn assembly in place. Remove those screws and pull the interior piece away from the door. The exterior cylinder will slide out from the other side once the interior is free.
Next, look at the edge of the door for the latch bolt — the rectangular piece that slides into the door frame. There are typically two screws holding the latch plate flush with the door edge. Remove those screws and pull the latch bolt assembly out of the door.
Finally, check the door frame for the strike plate — the metal plate with a hole that the bolt slides into. You can leave this in place if your new lock uses the same bolt size, or swap it out for the new one included in your lock kit.
Step 2: Install the New Latch Bolt
Slide the new latch bolt assembly into the hole on the door edge. Make sure the angled face of the bolt is pointing toward the door frame (so it compresses when the door closes). Secure it with the two screws provided. The latch plate should sit flush with the door edge — if it doesn't, you may need to chisel out a slightly deeper mortise.
A quick tip: hand-tighten the screws first, check alignment, then fully tighten. Over-tightening can warp the latch plate and cause binding.
Step 3: Install the Exterior Cylinder
Insert the exterior cylinder (the keyed side) through the large hole in the door from the outside. You'll notice a connecting bar or tailpiece extending from the back of the cylinder — this bar needs to pass through the latch bolt mechanism. Most deadbolts have a slot or hole in the latch assembly specifically for this bar.
Hold the exterior cylinder in place while you move to the interior side.
Step 4: Attach the Interior Assembly
Align the interior thumb-turn assembly with the exterior cylinder. The two pieces connect through the door, usually with two long mounting screws that thread from the interior side into the exterior cylinder. Tighten these screws evenly — alternate between them to keep the assembly square and prevent binding.
Test the thumb-turn before fully tightening. It should rotate smoothly and extend the bolt fully. If it feels stiff, back off the screws slightly and realign.
Step 5: Install or Adjust the Strike Plate
The strike plate on the door frame is what the bolt slides into when you lock the door. If you're replacing an old deadbolt with a new one of the same size, the existing strike plate may work fine. If you're installing a new strike plate, hold it in position, mark the screw holes, and drive the screws in.
For maximum security, use the long 3-inch screws that many quality deadbolt kits include. These screws reach through the door frame and into the wall stud behind it, making the strike plate dramatically harder to kick in. This single upgrade can make a standard door significantly more resistant to forced entry.
If the bolt doesn't align perfectly with the strike plate hole, you can adjust by slightly enlarging the hole with a chisel or filing the edges. Close the door slowly and watch where the bolt contacts the plate to identify the misalignment direction.
Step 6: Test Everything Thoroughly
Before calling the job done, run through these checks:
Lock and unlock with the key from outside — it should turn smoothly with no sticking
Lock and unlock with the thumb-turn from inside — same smooth operation
Close the door fully and lock it — the bolt should extend completely into the strike plate
Try to open the door while locked — it should not budge
Test all keys that came with the lock set
If the key is stiff, a small amount of graphite lubricant (not WD-40, which attracts dirt) applied to the key will help. If the bolt doesn't extend fully, check that the latch assembly is properly seated and the connecting bar is fully engaged.
Budgeting Your Lock Upgrade
Deadbolt quality varies widely. Here's a rough breakdown of what you get at each price point:
$25–$40: Basic Grade 3 locks — fine for interior doors or low-risk situations
$40–$70: Grade 2 locks — solid for most residential exterior doors
$70–$150+: Grade 1 locks (highest residential security rating) — recommended for front doors
If you're replacing multiple locks or comparing prices across stores, use the Discount Calculator to quickly figure out the best deal when sales or bundle pricing are involved. Hardware stores frequently run 20–30% off lock sets, and knowing the real savings helps you decide whether to buy now or wait.
When to Call a Professional
This project is genuinely beginner-friendly, but there are a few situations where professional help makes sense:
The door frame is damaged or rotted and needs structural repair before a new lock will hold
You're installing a deadbolt on a door that has no existing hole (requires a hole saw and more precise work)
You're installing a smart lock with wiring or complex programming requirements
The door itself is warped or doesn't close properly — fix the door first
For a straightforward swap of an existing deadbolt, though, this is a one-hour project that anyone can handle. The tools are minimal, the steps are logical, and the result is a home that's more secure and a lock that you know the full key history of. That peace of mind alone is worth the effort.
Before you act on this
This article is for general educational purposes only. Everyone’s situation is different, so before making any decisions please refer to a licensed contractor and check your local building codes and permit requirements who can advise you based on your specific circumstances.